Category: Sewing

Make A Zipper!!

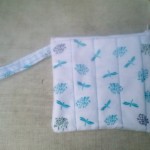
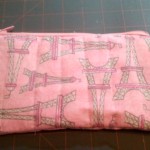
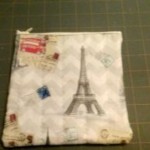
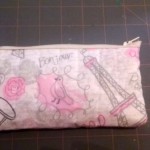
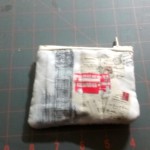
When a project becomes ‘several’ projects it’s time to look for some money saving tips!!  Erin started out wanting to learn how to put a zipper in and making a Wet Bag.  She went from ‘frogs to Paris’ and has had a great time.  She used PUL fabric (Polyurethane Laminate) which is waterproof and you will find it in the diaper section of JoAnn’s, to line her bags.  The first 2 bags are waterproof and the rest are zipper quilted pouches.  She even started adding loops to her pouches.

The wet bags are great for beach goers, swimmers and new moms that may need a way to ‘seal in the mess’ and keep the rest of the stuff dry.  The PUL fabric is washable, just check the end of the bolt for washing instructions.  I’ve used PUL to make cloth baby diapers and I can attest that it truly is waterproof!

As I’m sure you’ve noticed, Erin has been buying A LOT of zippers and one of the things I shared with her was that you can purchase zippers on a roll!!  They have many different colors and strengths.  I personally own black, white, cream and beige now and bought them from Amazon. 5 1/2 Yard Make A Zipper Kit with 12 pulls  These projects that she’s made make wonderful gifts and personal items that you can use at home.  I have to admit that I always love getting something I can use.  They also make great gifts that you can put a gift card or smaller item into!

It’s hard to believe that Christmas is right around the corner for those of us that sew. Time to put together a list of fun, quick gifts to make and a list of supplies!!
TO USE OLD BUTTONS OR NOT?!

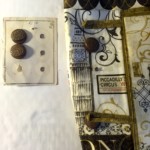
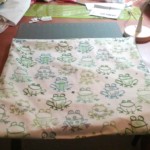
While sewing a somewhat revised version of Pockets A Plenty Tote, by Whistle Pig Creek Productions, I remembered that I had some lovely OLD buttons that I thought would work with the colors of the tote.  After rooting thru my button stash (read BIG box here), luckily some of the old ones came on cards and they were easy to find.  Perfect size, perfect color….what could go wrong?!  Well, apparently one of them is a little fragile and broke off when I swept my hand over the bag! I have SOOOO many beautiful old buttons and now I will be checking before using them.  Luckily this one broke off BEFORE I sewed the bag together.  And luckier still it’s going to my mother for a gift and I know she will tell me if they break!  (You can always count on your mom to tell you if something you made has had a mishap!  LOL)

I’ve never had this happen before and was wondering if you have?

2nd Annual SEWING FOR OTHERS!!

September is National Sewing Month!!

I think that’s cause for celebration!  Come to the 2nd Annual SEWING FOR OTHERS DAY!  What better way to celebrate than by getting together to sew, learn a few new skills, sewing with old and new friends and most importantly, to give back to our community!

Textiles by Tawny is hosting Sewing for Others in celebration of Nat’l Sewing Month.  We will be making toys and beds for the cats and dogs in area animal shelters and rescue homes.  All patterns, fabric and stuffing will be provided.  (Please see the sign up if you have extra pillows and t-shirts)  If you have a sewing machine and basic supplies please bring them with you.  Come for an hour or come all day!!

Ages 8 and Up and all skill levels, including beginners are welcome.  Come have some fun, meet other people who share your love of sewing and let’s make some cats and dogs really happy again!  The doors open at 10:30am!

We will be at Spirit of Joy Lutheran Church, 8600 Potter Rd, Matthews, NC 28104

WE HAD SUCH A FUN TIME LAST YEAR!! Come join us again on SEPT 10th from 10:30am-4:30pm!

Go to the sign up genius button on the HOME page in the upper right (or on mobile, Scroll to the bottom) and signup today!


Blue Ribbon Quilt!

image

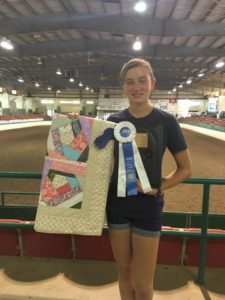
NC STATE 4H ARTISTIC EXPRESSION – SENIOR SEWING DIVISION – CHAMPION 2016

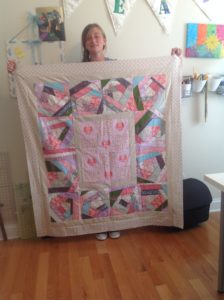
A big shout out to Madison for taking home a BLUE RIBBON for her crazy quilt.  She put crazy hours into this quilt.  All the outer blocks were machine sewn and embellished.  The center of the quilt was the first quilt she made and it was hand sewn.  It was decided that they would be sewn together to showcase all her quilting.  Heart appliqués were added to the center to tie in the fabric.  If you zoom into that pink fabric you will see some beautiful horses.  She has combined her love of horses and quilting.  That fabric is in each block!

Crazy quilting is a very impressive endeavor for a new quilter and yet she followed thru and took home the ribbon.

I can’t tell you how impressed I am for her sticking with it!!  So many (myself included) don’t always finish that hard project, much less go onto win a ribbon!  She put so many hours into the quilt in class and at home and finished just in time for the show.

As we were taking pictures at the last class before the show we were so excited!  Madison’s exact words were “Dang…I actually made this!”  It is so exciting to watch all of the children and adults grow.  And the feeling of accomplishment can never be taken away.  Sewing classes offers so much more than lessons.  We learn how to create, do a little math, persevere when we come to information we’re not sure of and problems we encounter and at the end of all this we can raise up our project and say, “Look what I made!”  THERE’S NO BETTER FEELING IN THE WORLD!!


Is Hancock Fabrics still Open?!

I know that Hancock’s is shooting for mid-July as a closing date and yet I’ve not been back for a week or so.  I’ll have to scoot over in the next couple of days to scope out any leftovers.

There was some shirred Disney fabric for a dress that I thought would be lovely for Baby Girl but at a starting point of $24.99 and having to buy 2 yards I decided to leave it behind.

Let me know if you’ve found anything you liked by leaving a comment below!

Crazy Quilting At It’s Finest!!

image

THE QUILT TOP IS DONE!!

The feeling that comes with finishing a crazy quilt top is almost too awesome to put into words.  The preparation, math, graphing, gathering the fabrics and THEN the ironing, sewing and embellishing.  I guess the smile says it all!

This quilt incorporates a small quilt from a hand sewing class in the center and 12 crazy quilt squares done on a sewing machine along with sashing and borders.  We added the hearts on the center squares to tie in the colors.   (If you look closely, you’ll see horses on one of the fabrics!)

Crazy quilts from a long time ago were done by hand and were often lifetime quilts.  Using scraps from clothing and incorporating memories from sometimes several generations.  You will find antique utility quilts and also the more celebrated specialty fabric quilts.  Any fabric from cottons to velvets were used.  The hand stitching was very labor intensive.  The centers are usually pentagons which allows fabrics to be added around in a circle.  One piece overlapping the last.  Of course, as soon as I say pentagons were used you will find one where it wasn’t. If you do, please share a picture.  Crazy quilts are wonderful since no two will ever be alike.

Even a crazy quilt done by machine takes a lot of time!  The foundation is muslin and we made sure there weren’t raw edges so this can be used.  There was a lot of ironing involved also.

The ongoing joke is that what we do shouldn’t be called SEWING.  It should be called…. Cut, Iron and THEN SEWING!!

This was definitely the case with this project!   Each square has anywhere from 12-17ish pieces of fabric x 12 squares!  All sewn down and THEN had the specialty stitches added from the machine.  That’s quite a commitment.

This has turned into a lovely quilt top that already holds a lot of memories!


Organize Your Small Fabric Pieces

This is the EASIEST way to organize your scraps under a 1/4 yard and fat quarter.

This system came about because I found myself buying soooo many fabrics for an applique class and wondered if I was just adding to my stash when all I needed was some 4″ x 4″ pieces.

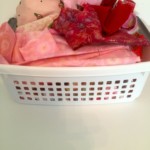
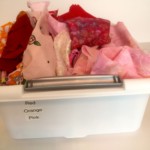
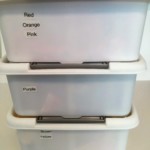
So off I went to Walmart and picked up several of these baskets. They are awesome because the size is great and they are stackable!  It makes for such a handy way to store and sort your small pieces.  I use the ROYGBIV way.  Red, Orange, Yellow, Green, Blue, Indigo & Violet  I also have containers for black, white, extra bindings, etc.  Any group of small pieces get a basket!

Just a quick tip…Make sure all your baskets are the same size.  The handles flip out and make them stackable!

Twin Needle Sewing Isn’t Anything NEW!

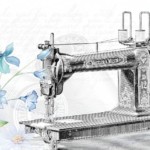
I came across a Wheeler & Wilson sewing machine picture recently and it showed being set up for twin needle sewing.  It’s fun to find pictures from the past that remind us that women have been doing this for a very LONG time.  This is a company I had never heard of but it was interesting to see the set up and I couldn’t resist checking them out.

This particular company was purchased by Singer in 1905.  I was able to find them on Wikipedia and it’s a hoot to see their ‘first machine’ patent in 1850.  Trust me…it’s NOTHING like this picture.  If you get a minute, jump over there to see the pictures and read the history.  Wheeler & Wilson Sewing Company  Scroll down to see the pictures on the right of the article.

A quick tip if you’re going to use YOUR twin needle:  Make sure you thread your machine with both threads at the SAME time.  Hold them together and follow the upper thread path as if you are using one thread.  Only divide them up when you get to the needles!  And if you’re wondering…your bobbin stays the same!

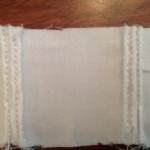
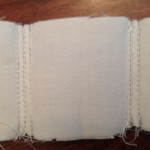
These pictures were sewn with a twin needle and a 5 groove pin tuck foot!

A Stitch in Time Saves Nine


needle-106375_640

I’ve always wondered where “a stitch in time, saves nine” comes from.  The best explanation I’ve found for this is in the first paragraphs at www.phrases.org.

The idea is that if you fix a hole or tear quickly with one stitch you won’t be needing 9 more!  That’s definitely a life lesson and it always helps to remember that putting things off sometimes really does make more work for us later.

So my homework to you (if you so choose it) is to grab that piece of clothing that needs a button or a hole sewn and take 5-10 minutes to fix it.  Send me a picture if you can and we’ll post everyone’s “stitch in time”.

Happy Sewing!!


Sewing & Science??!!

Absolutely!!  One of our students has used her love of sewing to get an A on a science project!!  Check out her pictures and learn a little about fabric composition.


It all started when we were chatting about the fibers in fabric and how can you tell if you have a 100% wool piece of fabric.  This has also been used to do a quick check of the wool if you are entering the Make It With Wool contest this fall in Concord, NC.  (This contest REQUIRES you to send a swatch of fabric in for testing.)  Please take the time to do this BEFORE making your garment!

Start with a fireproof dish, grill lighter and a pair of tongs.  This is preferably done outside since you will be burning fabric.  A natural fiber will burn to ash.  A fiber that has polyester in it will have a bit of hard plastic in it.  And a fiber that is all polyester should shrink up to a hard plastic ball.

It really is that quick and fun to find out if you are working with an all natural fiber.  If you are a purist for heirloom sewing, this comes in handy also to check your fabrics that you have on hand and may not of labeled as soon as you purchased them.  Not that any of us have an unlabeled stash!